One of the benefits of ASP.NET Core is the number of extensions that are available. The nice thing about this is that you can add these extensions when you need them, avoiding code bloat.
Authentication is just one of the extensions available. You can integrate Facebook and Microsoft authentication amongst others in ASP.NET Core without writing the functionality required. You can also integrate Google authentication and that is something we are going to have a look at.
Set up Service in Google Cloud Console
The first thing we need to do is to set up a project in Google Cloud Console. We will need a Google account in-order to set up a service. Afterwards, we will need to set up OAuth credentials which will be used in an ASP.NET Core application.
Set up Project
These steps will allow us to set up a project:
- At the top of the page, next to the Google Cloud Platform logo, there should be a project dropdown list. Click on that and select New Project
- Give the project a name and click on the Create button
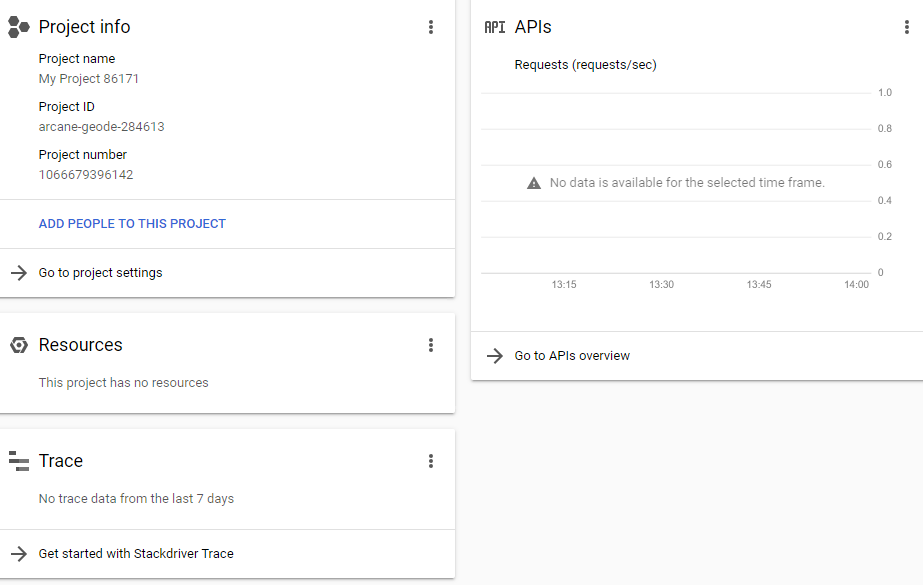
A page will be presented that will give us information about the project, such as information and the number of requests.
Consent Screen
Now that the project has been set up, we need to set up authentication. Here is how to do it:
- Click on the menu icon in the top-left hand side of the page. Navigate to API & Services and click on Credentials
- Click on the Create Crendentials button and select OAuth Client ID.
At this stage, a message will appear saying "To create an OAuth client ID, you must first set a product name on the consent screen".
Click on the Configure Consent Screen button and following the next steps:
- For User Type, select External
- Give it an Application Name
By default, Google will expose the email, profile and openid scopes. If we wish to add more, then we can click on the Add Scope button.
Once we are happy, click on the Save button.
OAuth Crendentials
We will now be able to set up the OAuth Client ID. We can do that with these steps:
- Click on the menu icon in the top-left hand side of the page. Navigate to API & Services and click on Credentials
- Click on the Create Crendentials button and select OAuth Client ID.
- For Application Type, select Web Application
- Give the application a Name if required
We will need to set an Authorised Redirect URI. This will need to be "{your_host}/signin-google". So if our web application is running securely on localhost:4000, the redirect URI would be "https://localhost:4000/signin-google".
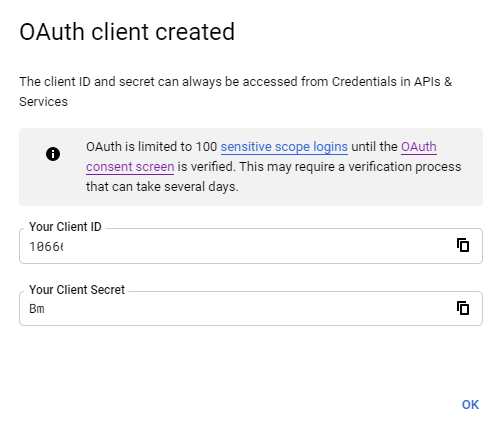
And that's it. Our OAuth credentials have been set up. On the screen will be the Client ID and Client Secret. We need to make a note of them as you will need to use them in our ASP.NET Core application.
Integrating Google Auth in ASP.NET Core
Now that we have our OAuth credentials, we can integrate Google authentication in our ASP.NET Core application.
I recommend setting up an ASP.NET Core MVC project in Visual Studio to follow this as we are going to use the default project that it creates for us.
The first thing we need to do is to add a Nuget package into our ASP.NET Core application. Open up Package Manager Console in Visual Studio and run the following command:
Install-Package Microsoft.AspNetCore.Authentication.Google
This package will contain all the functionality required to set up Google authentication.
Configuration
We now need to configure our ASP.NET Core application to set up Google authentication. In-order to do this, we need to make some changes to our Startup class.
// Startup.cs
public class Startup
{
	...

	// This method gets called by the runtime. Use this method to add services to the container.
	public void ConfigureServices(IServiceCollection services)
	{
		services.AddAuthentication(options =>
		{
			options.DefaultScheme = CookieAuthenticationDefaults.AuthenticationScheme;
		})
		.AddCookie(options =>
		{
			options.LoginPath = "/account/google-login"; // Must be lowercase
		})
		.AddGoogle(options =>
		{
			options.ClientId = "1066....";
			options.ClientSecret = "Bm....";

		...

	}

	// This method gets called by the runtime. Use this method to configure the HTTP request pipeline.
	public void Configure(IApplicationBuilder app, IWebHostEnvironment env)
	{
		...

		// Must be before UseEndPoints
		app.UseAuthentication();
		app.UseAuthorization();

		...
	}
}
The first thing we do is call AddAuthentication and set up a default scheme. As we are not using Identity for this example, we will use the CookieAuthenticationDefaults scheme.
Next, using the AddCookie method, we need to set up a default path for where a user is redirected when they require authentication. We have set this up as /account/google-login, and we will set this up in a bit.
Finally, using the AddGoogle method, we provide our client ID and client secret which was created when we set up a project in Google Cloud Platform.
A Change to HomeController
We are going to require authorisation to the actions inside HomeController.cs. For that, we can use the [Authorize] attribute, which can be replaced just about the class declaration.
However, we to allow all traffic to our home page. So we can add a [AllowAnonymous] attribute above our Index method for this to happen.
// HomeController.cs
[Authorize]
public class HomeController : Controller
{
	...

	[AllowAnonymous]
	public IActionResult Index()
	{
		return View();
	}

	...
}
AccountController
We are going to create a new Account controller. This controller will contain two methods.
The first is a GoogleLogin method which will request authentication and send the user of to Google. This will route to /account/google-login, which is what we set up as the LoginPath in our AddCookie method inside Startup.
The other is a GoogleResponse method that will redirect the user back to the ASP.NET Core application once they've authenticated with Google. This is set up in our GoogleLogin method, using an instance of the AuthenticationProperties class.
When the GoogleResponse is called, we return the claims that Google have given us access to.
// AccountController.cs
[AllowAnonymous, Route("account")]
public class AccountController : Controller
{
	[Route("google-login")]
	public IActionResult GoogleLogin()
	{
		var properties = new AuthenticationProperties { RedirectUri = Url.Action("GoogleResponse") };
		return Challenge(properties, GoogleDefaults.AuthenticationScheme);
	}

	[Route("google-response")]
	public async Task<IActionResult> GoogleResponse()
	{
		var result = await HttpContext.AuthenticateAsync(CookieAuthenticationDefaults.AuthenticationScheme);

		var claims = result.Principal.Identities
			.FirstOrDefault().Claims.Select(claim => new
		{
			claim.Issuer,
			claim.OriginalIssuer,
			claim.Type,
			claim.Value
		});

		return Json(claims);
	}
}
Just a note that we've added a [AllowAnonymous] to the AccountController. This is so you don't need authentication to view the methods in this controller.
You can download the code example if you wish to try it out for yourselves.
Also, you can watch back our live stream where we create a new project in Google Cloud Platform, set up Google authentication in an ASP.NET Core application and watch the Google authentication in action, including the claims that are exposed from Google.
A Word on Identity
A number of you may be using Identity for your authentication, and may have integrated a solution like Identity Server. You will need to check the instructions to see how exactly to integrate Google authentication with it. But the way you set up a project in Google Cloud Console should be largely the same.